Overview
So you got Plex up and running, and that’s great! But what about all of your ebooks? Wouldn’t it be nice to have those self hosted and accessible from any device as well? I thought so, too! One of the most popular ebook managers out there is an app called Calibre.
Calibre is a great way to organize and consolidate your ebook collection. At first I had it on my laptop and just used it from there, but accessing books over on my kindle or iphone was a bit of a process, so I moved to a service called Calibre Server, which I hosted in a VM. To be honest, it was, in my opinion, a bit finicky and poorly designed, although it did allow me to access my books from any device on my network. Once I started playing with docker, I found Calibre Web and I haven’t looked back!
A simple, sleek interface and instant access to newly uploaded books, this service runs in a tiny container so I don’t have to over-commit to a bunch of resources to a virtual machine I only use intermittently (whenever I’m done with what I’m currently reading).
Thanks to docker and rancher, the setup is simple!
- Set up Folders
- Pass-through the Network share
- Configure Calibre Service in Rancher
- Add Books
- Add to Heimdall
- Read!
Let’s dive in!
Setup Folders
Create Library
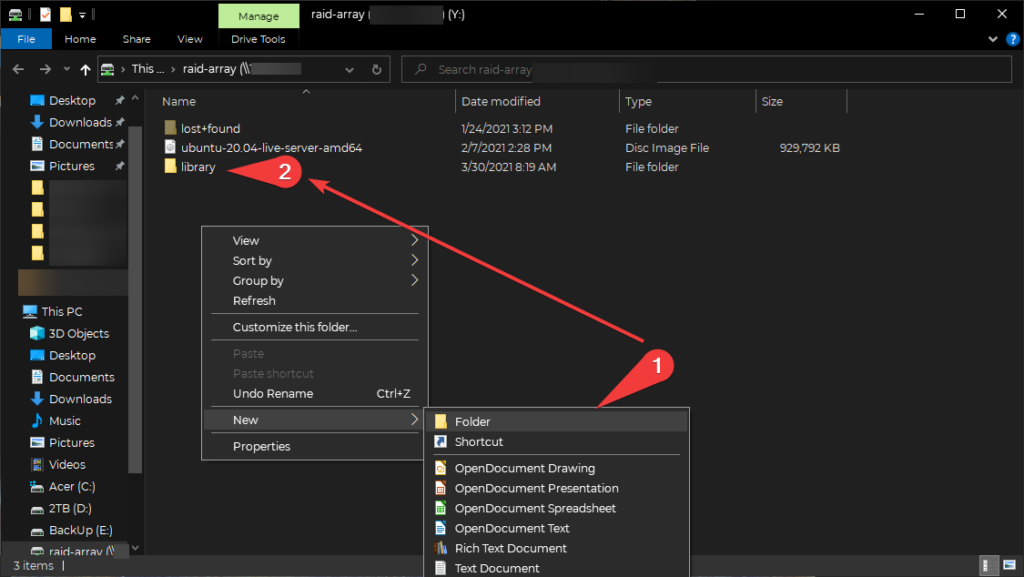
First, you’ll want to create a Library with a database file. To do this, Open your laptop and download the Calibre app. For this tutorial, I will be on a windows laptop, but the steps will be similar for all OSes. Once everything is downloaded, head over to your network shared folder (that we set up in this post). Access the share and create a new folder by right-clicking in the window and selecting New>Folder. Name it whatever you like, but for this tutorial we will name it something really original… library:
Now, Open your Calibre app on the laptop, at the top, click on the library icon and select the “switch/create library” option:

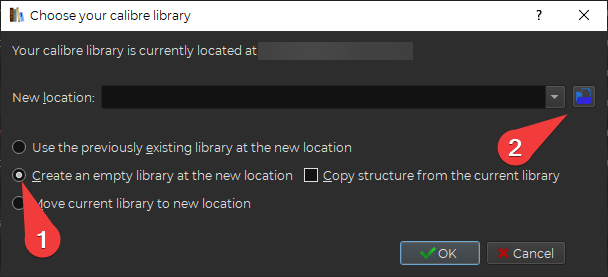
In the “Choose your calibre library” window, click the “Create an empty library at the new location” and then navigate to the folder you created in the network share using the folder button to the right of the “New location” field:
Once you’ve clicked into the library folder, click the “Select Folder” button.
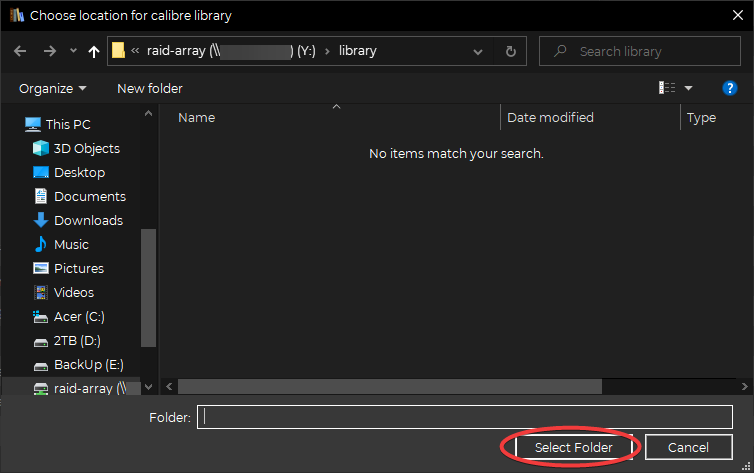
Then hit the “Ok” button.
You will be presented with a blank library. On the backend, if you look in the library directory on the samba server (/mnt/raid-array/library in our tutorial), you’ll see that a “metadata.db” file has populated. Congrats, you’ve got your empty library setup.
Create Local Config Directory on VM
SSH into the Docker VM (or use the virt-manager as below). In the command line type the command:
mkdir ~/calibre && mkdir ~/calibre/configWe will need this to save the configuration files to when we create the docker service. This will preserve all of our information locally to make re-creating the service really easy if something happens and our service gets corrupted somehow.
Pass-through the Network Share to Docker VM
Now we are going to share the library folder over to the docker image. Docker is a bit finicky about network shares, and we have the ability to do a passthrough with our setup, so that’s what we’ll do.
If you remember from this post, in the “Pass Through Host RAID to the Samba VM” section, we are going to follow that process, but we are going to do it with just the library folder.
Set up Passthrough in Virt Manager
As we have before, on your laptop, make sure xming is running, SSH into your host server, then bring up the virtual machine manager:
virt-managerOnce there, you’ll see your Docker VM. Double click on it and in the console view, login and add a directory:
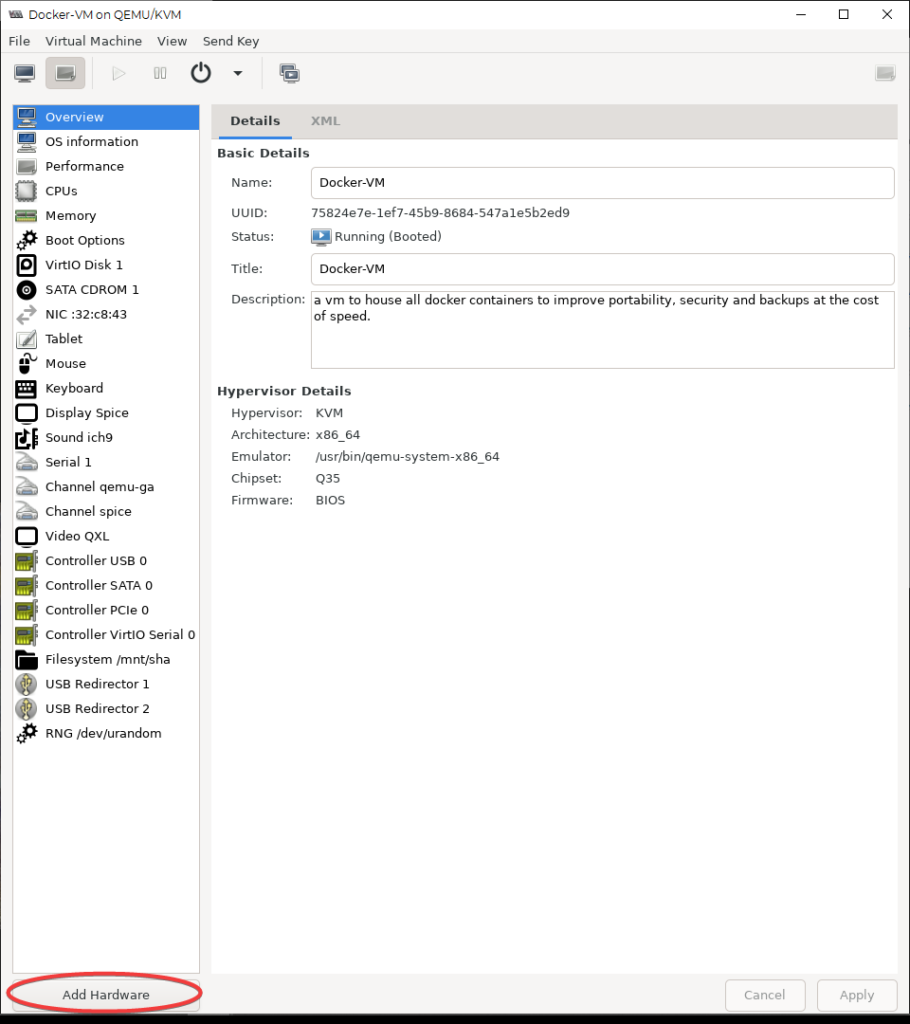
mkdir /mnt/shared-libraryNow shut down, and switch to the details view and click on the “Add Hardware” button:
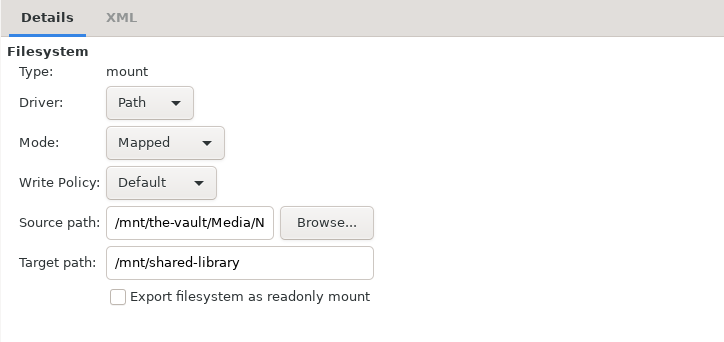
Next, you’ll select “Filesystem” and setup the share as below. Make sure the Driver is Path, the Mode is Mapped, the Write Policy is Default and the 1st field goes directly to the library folder you just created (use the “Browse” button to navigate to it) which in our tutorial is “/mnt/raid-array/library”. The second field is a reference for us to use when editing the fstab configuration.
Edit fstab to Mount Share at Boot
With that completed, apply the changes and boot the Docker VM back up. Log in to the vm (via SSH) and navigate to the fstab for editing:
sudo nano /etc/fstabAt the bottom of the file, add the below:
#for calibre database
/mnt/shared-library /mnt/shared-library 9p,trans=virtio,rw 0 0
Save and exit the editor (“Ctrl+x”, “y”, “ENTER”). Then restart the vm to make sure that the directory mounts properly on reboot.
rebootLog back in and navigate to the library:
cd /mnt/shared-library && lsYou should see the “metadata.db” file in the listing. If you do, you’re good to go!
If nothing is showing up or you see an error mounting at boot, double-check both the Docker VM fileshare configuration in virt-manger and the fstab edit.
Now we will set up the Calibre Web service in Rancher
Configure Calibre Service in Rancher
To spin up the service, it is very simple! As we’ve seen before in this post, you can use the information on the calibre-web configuration page over at linuxserver.io:
docker run -d \
--name=calibre-web \
-e PUID=1000 \
-e PGID=1000 \
-e TZ=Europe/London \
-e DOCKER_MODS=linuxserver/calibre-web:calibre \
-p 8083:8083 \
-v <path to data>:/config \
-v <path to calibre library>:/books \
--restart unless-stopped \
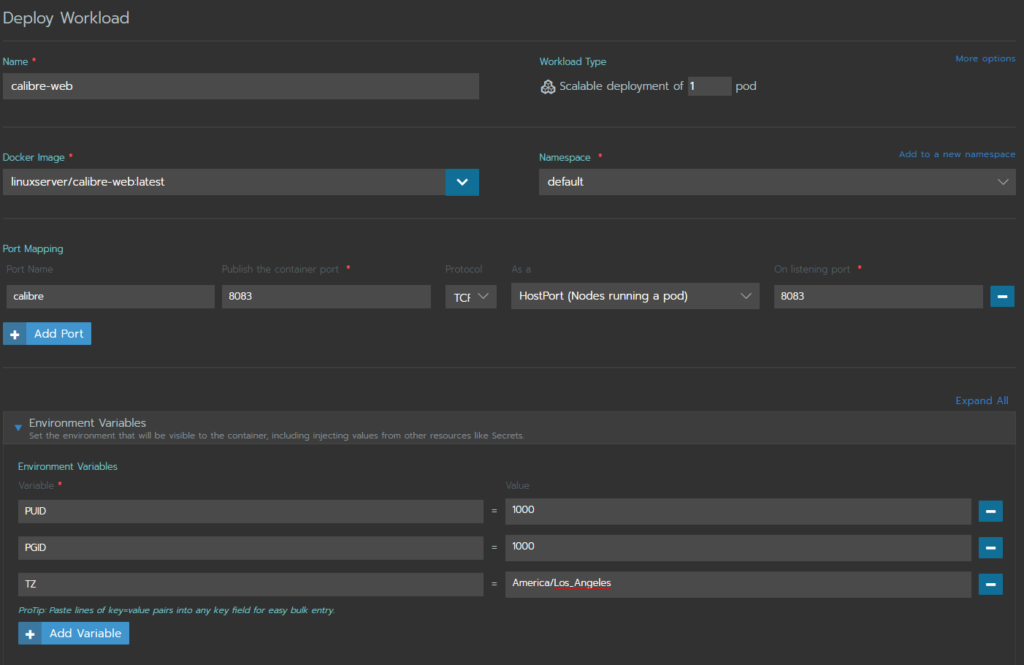
ghcr.io/linuxserver/calibre-webOpen Rancher (from your heimdall graphical user interface if you’ve been following this series). Navigate your cluster’s default namespace and select “deploy”.
Add the name, port mapping, etc based on the docker code from the linuxserver.io page:
Most of the environment variables are pretty standard, but there is one optional one that we’ve omitted above:
DOCKER_MODS: This option allows for online conversion of book files (MOBI, EPUB, PDF, etc.). If you are going to try to use this to add, remove and edit your library then I would include this variable. However, we’ve set it up so that we do all of those functions through a client install on a laptop that is also linked to the server library and use the calibre web server exclusively to provide access and downloads from the library. You’ll see how we’ve done this in a minute.
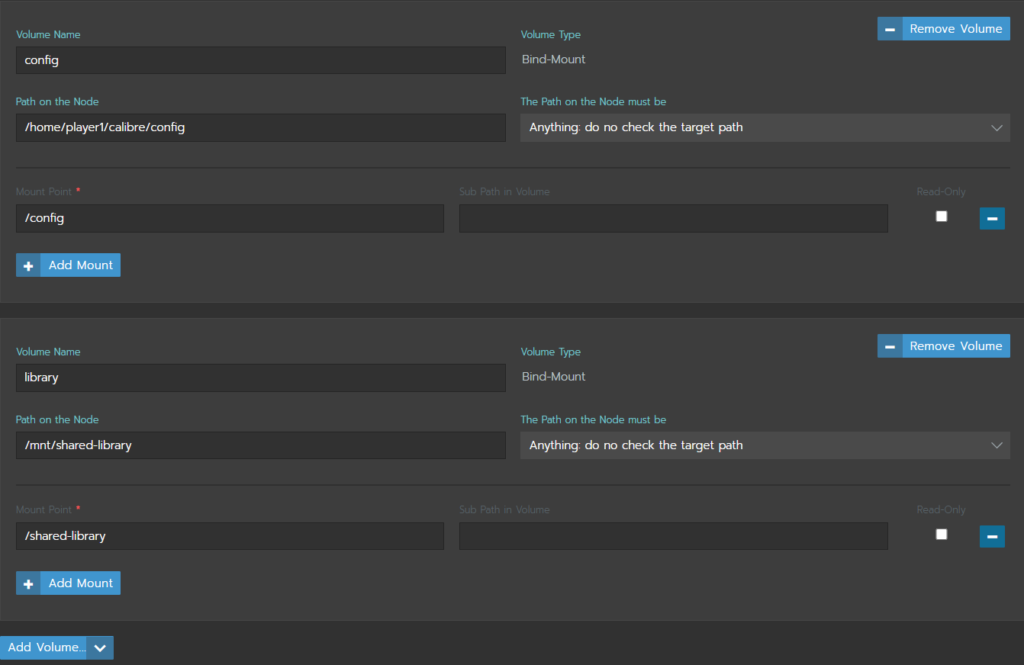
Now add a volume with the “Bind-mount a directory from the node” option. This saves your configuration files on the VM so that you don’t lose anything if the container is deleted and a new one instantiated.
You’ll also add a volume that points to the shared-library that we set up so the server knows where to look for the library books.
Finally in the “Scaling/Upgrade Policy”, select the “Kill ALL pods, then start new” option and launch the pod!
First Login
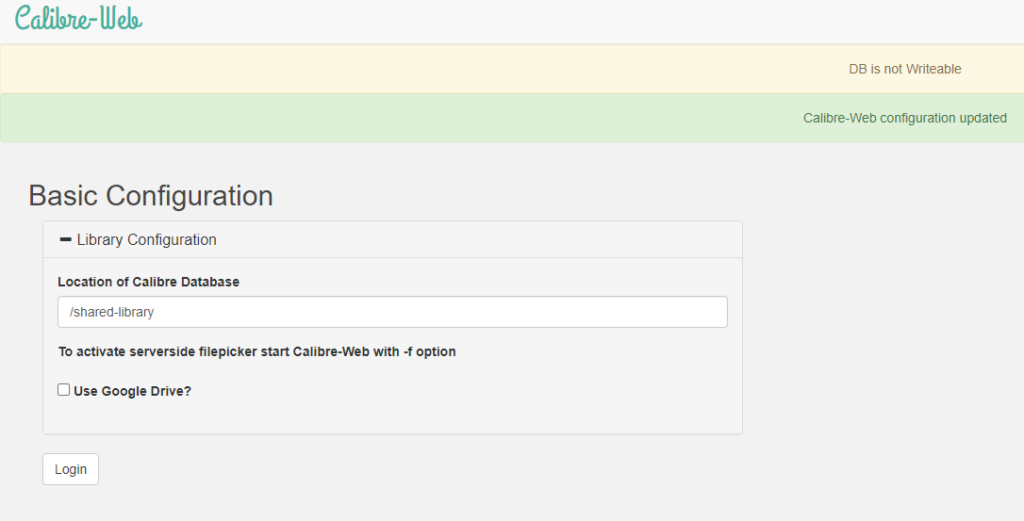
On the initial setup screen, enter /shared-library (or whatever you named the directory in the rancher volume assignment) as your calibre library location, then click “save” at the bottom. Once that updates, it will let you know you can now login. Click “Login”
Default admin login: Username: admin Password: admin123
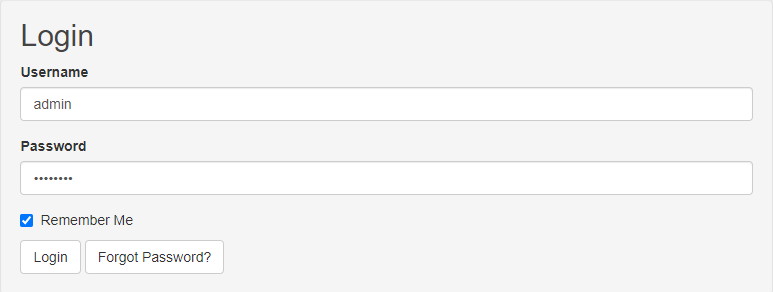
Obviously, change the password as soon as you can. Otherwise, you should be taken to the web portal to your (empty) library! Now- let’s get some content, shall we?
Add Books
Now for the good stuff! My 2 favorite ebook sources are the Gutenberg Project and HumbleBundle.com.
The Gutenberg Project offers thousands of FREE ebooks whose copyright has lapsed. You will find many of the classics here. I like to download the classics and philosopher writings from here as well as many other genres.
HumbleBundle is a great (and affordable) resource for getting lots of books (a bundle) around a general topic for very low prices. Topics range from computer science to home brewing to meditation and gardening and more! Each bundle offers several options for purchase and even allows you to allocate how much of your money goes to the publisher, to HumbleBundle itself, and a chosen charity!
For this tutorial we will stick to the free stuff…
Download a Book
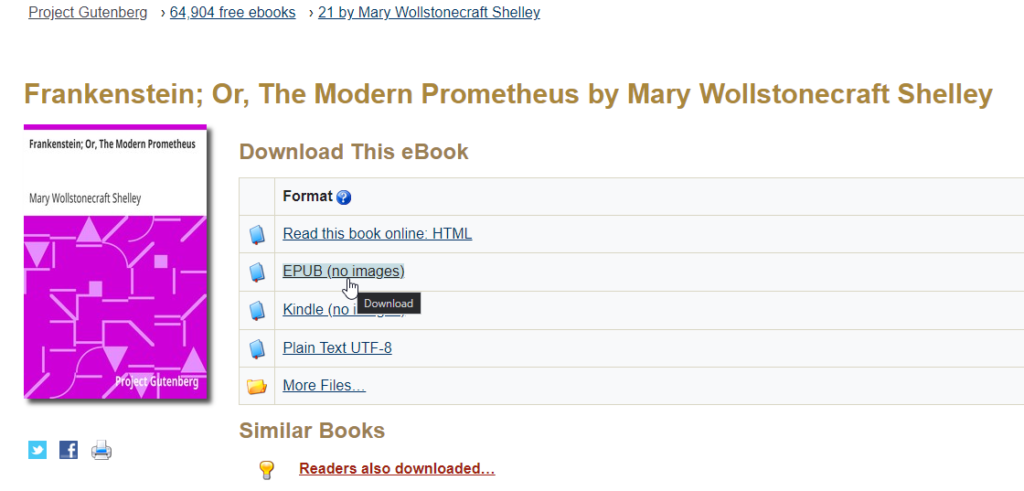
Open the Calibre client up on your laptop and then head on over to the Gutenberg Project.
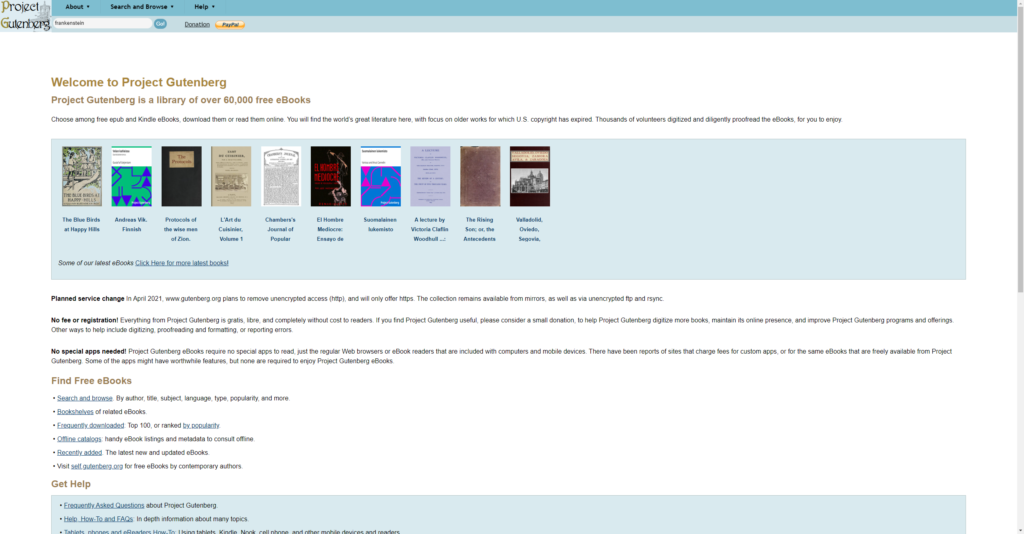
From there, type “frankenstein” into the quick search in the upper left. Click on the first link your are provided and then select “EPUB” format.
Add the Book to Calibre-Web via the Laptop Client
Download it to wherever you like on your laptop. We’ve saved it in the downloads folder on our windows laptop. head over to the calibre app and open it (if not already open). You should be in your emtpy library that we connected to earlier. Next, open a window to where your Frankenstein book was saved. Click and drag the book into the empty field in Calibre:
Okay- the book is in our library now!
Don’t believe me? go back to the calibre-web interface in your browser and refresh the screen… BOOM! There you have it! You can now go to this in a browser in your kindle reader or phone and download the book file!
Now add whatever you like! And don’t forget to check out HumbleBundle as well!
Add to Heimdall
Now that you are all set up… Let’s eliminate the need to type in the IP:port to get to this service. If you’ve been following the series, we can now add this to heimdall! Open Heimdall on your web browser and just like before, select the bullet list icon in the lower right of the screen (Application list). Now click “ADD” in the upper right of the popup window and fill in the fields as below:
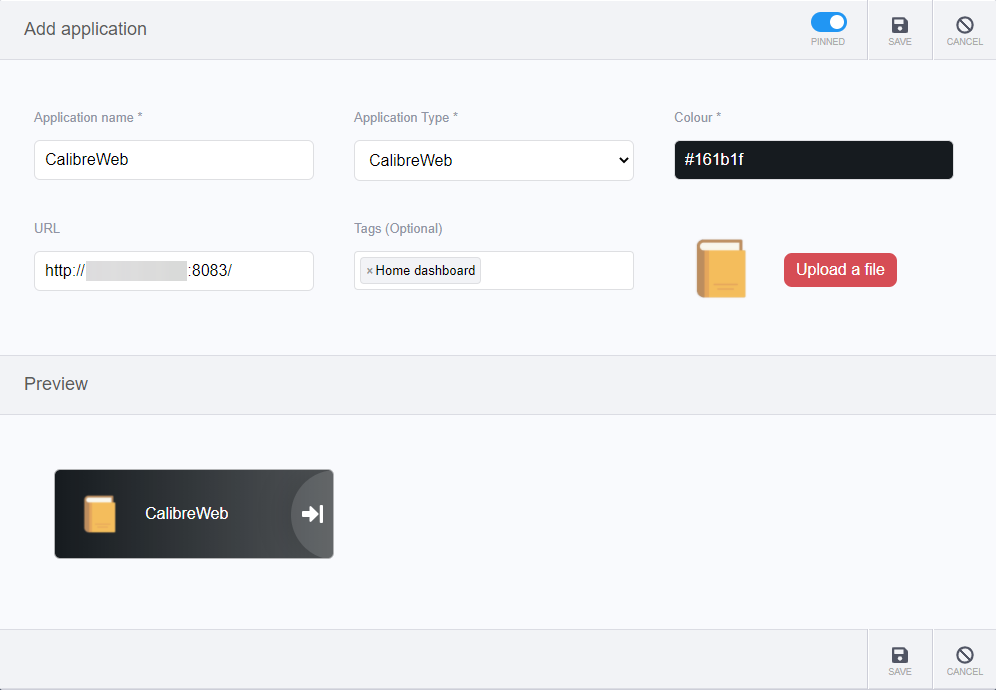
Make sure “Pinned” is enabled. Be aware the your URL field will be different. You can simply copy/paste from the URL bar in the browser tab that your calibre-web interface is showing.
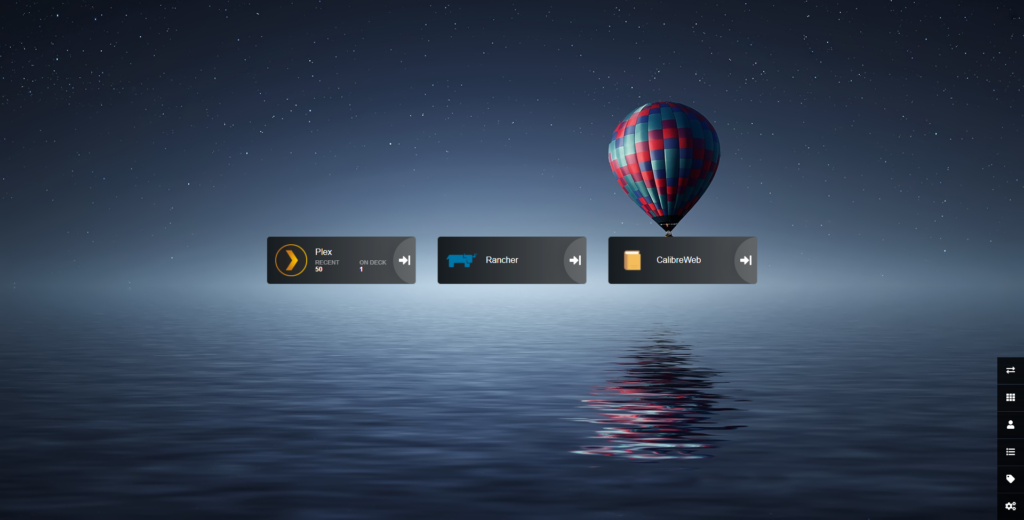
All set! now you can access all of your services here in Heimdall:
Wrapping Up
That’s the long and the short of it, folks! Although, in the process of creating this tutorial, I found out that calibre web (as opposed to calibre server) does support network file shares! So if you’d rather not do a pass-through filesystem and would rather provide a network share to the Docker VM, by all means you should do so!
Also, once you have Calibre Web set up, there are some nice UI changes you can make on the interface- I really like the dark theme. You can also check out the features in the client version of Calibre to find cover art, change metadata and more.
So… what did we miss? Do you have any other great ebook resources? Have you included the “DOCKER_MODS” variable and used it to manage your library directly? Leave a comment below and share your experience!
Terms Used
No new terms were used in this article.
Commands Used
- mkdir: Creates a directory (folder) in the present one. You create a sub-directory elsewhere but including the path to where you’d like to create it (mkdir /home/player1/path/to/[NEW-DIRECTORY]).
- virt-manager: Starts the Virtual Machine Manager interface.
- nano: one of the more simple text editors used in linux.
- reboot: …reboots the device.
- cd: Change Directory.
- docker run [OPTIONS]: Creates a container with the configuration options defined in the [OPTIONS] section.