NOTE: This post assumes you already have a samba server set up (if you have not yet set up a samba server, please check out my other post on samba server configuration here).
Overview
Last week we showed you how to connect to a samba share from a windows client. As we continue to create more VMs, however, we will need to connect to other linux machines as well… servers in particular. This post picks up where we left off!
Network storage is a huge benefit to a home environment! It creates a single location to store and retrieve all of your files and is available to virtually every other device on your network. This keeps your computers free of excess files or create a secondary local backup of your files (though a 3rd off-site backup is still recommended for true data redundancy).
Accessing these files from an iphone or windows machine are fairly straight forward. But how do we access these files from another linux server on the same network? With no easy-to-use interface, the command line can seem daunting, but really it’s a simple task of telling the computer where to go and how to log in to access these files.
Let’s take a look at two popular options for network sharing…
CIFS Mount via fstab
“Common Internet File System” (cifs) is a network communication protocol (at the application level) that provides access to files, printers, serial ports and file systems that can be mounted like any standard filesystem. This is used for common “Samba” shares in linux. Samba is an implementation of the Server Message Block (SMB) protocol, which is a parent version of the cifs protocol.
This brief historical lesson is simply to let you know that this kind of network share will require you to have a samba server to host whatever files you’d like to share, and a client to share the files with.
Mounting to a Linux Client
NOTE: I am using Ubuntu 20.04, but this instruction set should work for most debian-based linux distributions.
With your samba share set up on the server side, we will be working mostly on the client side, but for the sake of this tutorial, let’s assume your samba share on the server is:
//192.168.10.100/my-shareWhere the IP is the address of the server, and the ‘my-share’ is the name of the share that you’ve created in the the samba configuration file. The slashes are just a format thing that you’ll have to get used to.
Step 1: Download Utilities
On your client linux operating system, you’ll need to install the cifs utilities:
sudo apt install cifs-utilsEasy enough, right?
Step 2: Create Mount Point
Now we’ll need to make a directory (a file folder) on the client for the server’s share files to live in. This is called a mount point and can technically be created anywhere in your file system. However there is a directory that makes the most sense to mount files in… the ‘mnt’ directory. To create the directory, type the below into the command line:
sudo mkdir /mnt/test-mountThe “test-mount” part of the above line is what you are actually creating with the mkdir (make directory) command. You are creating it inside the “mnt” folder, which technically makes “test-mount” a sub-directory, or rather, a folder inside of a folder.
NOTE: You should call this directory something that makes sense. For instance, if you are mounting a shared folder of all of your music, then name it ‘music’ or ‘my-music’… Please. Really. I beg of you… in the name of all that is good and righteous in this world, please don’t call it test-mount unless you’re actually just testing that this tutorial works.
Step 3: Create Credential File
Having previously set up your Samba Server, you will have users assigned to your share (again see my other post for details on a samba server setup). This is for security reasons. You don’t want your visiting Aunt Sophie to be able to find and watch your network shared animated unicorn porn, do you? Maybe you do… I don’t really know- no judgements.
At any rate, you’ll need the credentials for a user that has been allowed access to that share. Now, you could directly enter those credentials in the fstab file in step 4, but it is considered a security best practice to separate username and password from the line of configuration that mounts the file share. To whit;
Change to root:
sudo -iYou will be asked for your password for the client. Without going into too much detail, root privileges can be dangerous, so be careful and don’t go playing with a bunch of settings! If you’re a linux luddite, just follow the tutorial and you’ll be just fine!
Once you have become root, create a file for the samba-credentials:
nano .samba-credentialsNOTE: The ‘.’ prior to the file makes it a “hidden” file, and is a security related practice.
You will be presented with a blank file, to which you will add 2 lines:
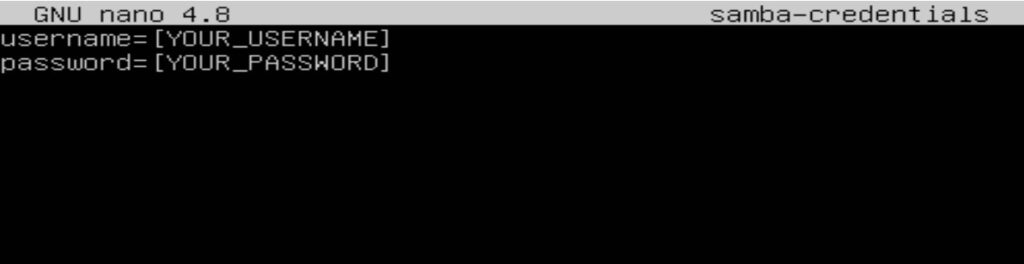
Please swap the [YOUR_USERNAME] and the [YOUR_PASSWORD] for, well, your username and password that will let you access the samba share. To be clear this is the user that you’ve set up over on the samba server, just so there is no confusion. Also, make sure there are no spaces in either line
My standard way of saving is simply to hit “Ctrl+x”, then hit “y” and finally hit “Enter”. You’ll notice at the bottom of the screen that there are prompts for each button press. If you want to ensure your file has properly saved, you may run the command:
cat .samba-credentialsThis will print the contents of the file to the screen.
Once you’ve confirmed the entries that you typed have printed to the screen, you should restrict access to this file even further. You may do this by entering the below into the terminal:
chmod 400 .samba-credentialsThe above will set the file to be inaccessible to anyone but root and also protect it from being edited, but will still allow the contents to be read to mount the file share.
before leaving, make sure you know the full path to this file we’ve just created. You can check by typing:
pwdpwd, or present working directory, will print the full path to the screen, like so:
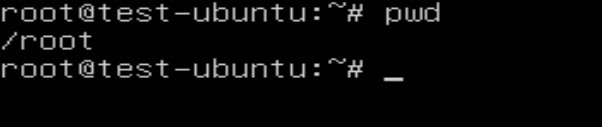
Write down the path, and add a ‘/’ and the name of the file to the end of it (in our above case it would be: /root/.samba-credentials).
Now- get out of root! type:
exit…and hit ‘Enter’. You will be changed back to the standard user.
Step 4: Setup the Filesystem to Mount on Startup
From here, you will need to add a line to a file called fstab – file system table– in order to have the share connect when the computer starts up. There are several editors we can use for this, but let’s keep it super simple and use the below line:
sudo nano /etc/fstabThe above line asks the editor (nano) to open the file (fstab) located in the “etc” folder. when it opens you should see something like the below:
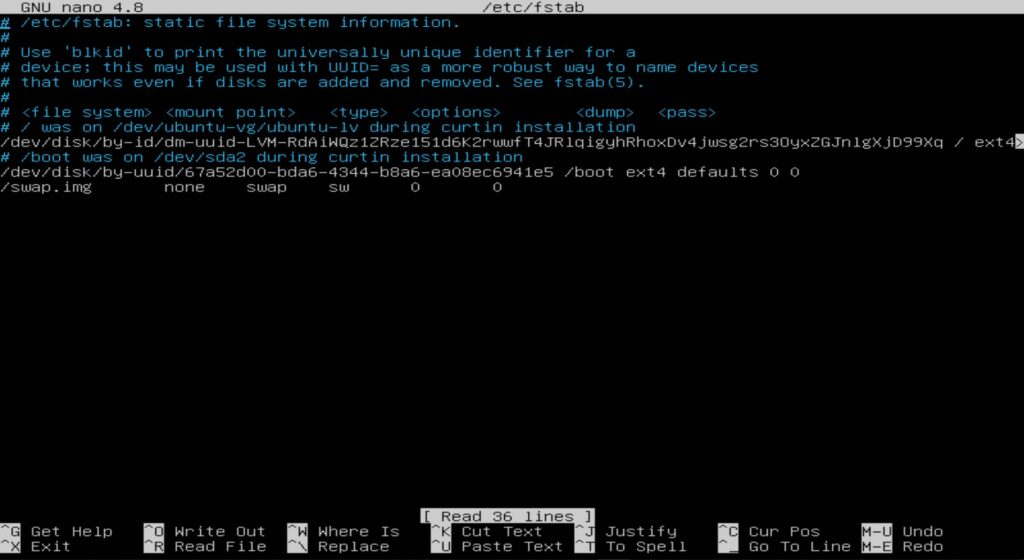
Inside the file, go to the bottom of the file using the down arrow. Once there, you’ll need to write a line to tell the operating system to mount the share upon startup. The format of the line is as follows:
//[SAMBA-SERVER-IP]/[SHARE-NAME] /[CLIENT-SIDE]/[MOUNT-POINT] cifs credentials=/[PATH-TO]/[CREDENTIALS] 0 0So with the names we’ve created in this tutorial, you would type:
//192.168.10.100/my-share /mnt/test-mount cifs credentials=/root/.samba-credentials 0 0Here’s is what that line would look like in the editor:

Save the file (ctrl+x, then ‘y’, then ‘enter’).
From here, once you restart, the file share should be mounted and accessible. But why wait? with one command you can check without having to wait for a reboot:
sudo mount -aAfter that you can navigate to the file share using the cd (change directory) command:
cd /mnt/test-mountonce in the directory, list the contents of it with the ls command:
lsIf you receive any error messages or are unable to access files, be sure to check the below:
- Triple check the format of the added line in fstab (server IP, the local file path, the slashes, etc.)
- Make sure that the username and password is correct in the /root/.samba-credentials file. Check it against the user information in the samba server itself.
- Check that the path to the credentials file is correct and there are no spaces in the lines (username=bob, not username = bob)
Additional Infomation
It should be noted that there are other common configuration options you can add to the fstab line. For instance:
//192.168.10.100/my-share /mnt/test-mount cifs credentials=/root/samba-credentials,iocharset=utf8 0 0Where ‘iocharset=utf8’ is setting that allows access to files with non-English names.
Here is a link to the various cifs options.
Auto FS Mount
More often than not, the standard fstab setup is perfectly fine for mounting external (or additional internal) drives that are physically connected to your client. However, there are some cases in which it might present difficulties with network shares.
Since it tries to make connections very early in the boot process (like- before the network connection has been made), fstab could fail, or it could extend the boot and/or shutdown times for your client device. If this is the case, autofs might be for you as it can solve connection issues and speed up boot times by eliminating the mount attempts at boot.
Before we get into it, I should note one more benefit- autofs makes a network connection only when it is going to be used. If you try to access a file on a network share, then autofs kicks in and makes the connection. After a while of inactivity on the connection, autofs will close that connection until called again. This can increase network efficiency.
Let’s take a look…
Step 1: Download Utilities
Just like the cifs mount, you’ll need to download the required packages:
sudo apt install autofs cifs-utils
(If you have already downloaded the cifs-utils, then you can remove that part of the command)
When asked if you want to continue, type ‘y’ and then ‘Enter’.
From here, let’s navigate to where the autofs config files were downloaded.
cd /etcStep 2: Set up a Mount Configuration File
While in the /etc directory (folder), you’ll need to create a file that will describe how you want the network share mounted.
sudo nano auto.testshareNOTE: Again, the ‘auto.testshare’ should be changed to something that accurately describes the share you are creating. If you have a bunch of movies, it should be “auto.moviemount” or “auto.movieshare”.
We will need to add a line in here to describe the network connection. Here is the format:
[NAME-OF-DESIRED-LOCAL-DIRECTORY] -fstype=cifs,rw,noperm,credentials=/[PATH-TO]/[CREDENTIALS] ://[SERVER-IP]/[SHARE-NAME]So in our example, the line would be:
test-mount -fstype=cifs,rw,noperm,credentials=/root/.samba-credentials ://192.168.10.100/my-shareSave the file ([ctrl+x], ‘y’, ‘enter’). Note that “test-mount” will be the name of the sub-directory inside of the /mnt folder (just like in the fstab example). We will see in a moment how we set this to be in the /mnt directory.
See Step 3 in the fstab section above to see how to create the credential file.
Step 3: Set auto.master to Read Your Config File
After saving the auto.testshare file, you should still be in the /etc directory. (you can double check by using the pwd command). While there, you will need to edit an existing file – the “auto.master” file:
sudo nano auto.masterIf you are not in the /etc folder, you will need to type the whole file path in order to get to the proper file: sudo nano /etc/auto.master
once in the file, use the down arrow to get to the bottom of the file. You’ll be typing a line in the format:
/[DIRECTORY-IN-WHICH-TO-MOUNT] /[FILEPATH-TO]/[MOUNT-CONFIG-FILE] [OPTIONS]So in our example:
/mnt /etc/auto.testshare --ghostSave and exit ([ctrl+x], ‘y’, ‘enter’).
NOTE: See the /mnt in the above line? That is how the auto.testshare is told to mount test-mount as a sub-directory of /mnt. It is a bit different from the fstab because this is defined in two separate files, but has the same effect.
While there are other options, I do not currently personally use any other options besides “–ghost” which creates an empty “ghost” directory so you will still be able to see where the auto-mounted directory is and what it’s name is even when it is not actively connected. This is highly recommended.
Autofs GOTCHA!
The one downside to this style of mounting is that if you have an instance of autofs that is mounting something, and you try to make another subdirectory in /mnt, it will fail and give you a “permission denied” error, even if you are using sudo!
To fix this, I’ve found that stopping the autofs service:
sudo service autofs stopand then unmounting the drive:
sudo umount /mnt/[SHARE-NAME]You should be able to add your directory then and restart the autofs service after with:
sudo service autofs startWrapping Up
If you’ve read this far, thanks for sticking with it! I hope you’ve found this a useful tutorial to get your drives and network shares mounted and accessible.
Important Terms:
- CIFS: Common Internet File System.
- SMB: Server Message Block.
- mount point: An empty directory which will be used to place shared files. Typically it is a subdirectory of an existing folder.
- sub-directory: A folder within a folder.
Commands Used:
- mkdir: Make Directory. Used to create a folder.
- nano: One of many editors in linux. This is used to edit or create files.
- cat: Concatenate. Used to print contents of a file to the screen (no file creation in the above example).
- pwd: Present working directory. Shows the file path to the directory (folder) that you are currently in.
- chmod: Change mode. Alters the permissions of a file or directory
- mount: To make a drive accessible to users.
- ls: List. Shows contents of a directory.
- cd: Change directory. Allows users to navigate to different directories from the command line.